Inscrivez-vous maintenant pour un meilleur devis personnalisé!


Raspberry Pi fitted with a UPS
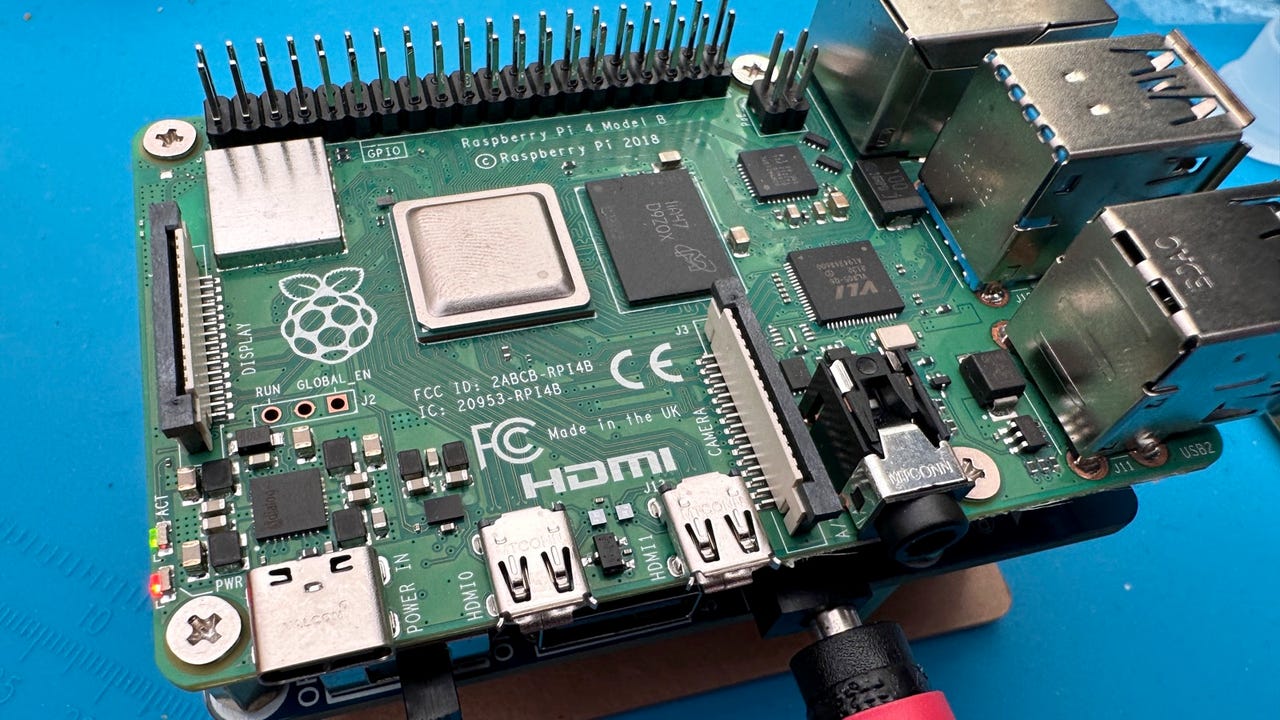
Adrian Kingsley-Hughes/The Raspberry Pi needs little introduction. This single-board computer has become an essential tool for tinkerers,tech enthusiasts,and programmers.
But what happens when the power goes out?
Also: The best portable power stations you can buy
I had a project where I needed a Raspberry Pi to run 24/7/365 with as high a level of uptime as possible. While power cuts are rare in my neck of the woods, they can happen. I needed to make my Pi resistant to such outages. I needed a UPS -- short for uninterruptible power supply -- a battery backup mechanism that kicks in when the power goes out.
Here's the UPS I opted for: a Waveshare UPS HAT (B) .
The UPS HAT allows you to use two 18650 rechargeable batteries as a backup power supply for your Raspberry Pi. No soldering is required and you can still use the GPIO pins on the top of the Pi.
View at AmazonAlso: Finding Raspberry Pi: Where to buy the latest model and its alternatives
Note: I've also used theGeeekPi UPS HAT , which offers similar functionality but uses micro USB, which charges at a slower rate than the Waveshare board at a similar price.
The Waveshare UPS HAT (B) fits onto the bottom of the Raspberry Pi.
OK, got all the bits, so I'm ready to go.
All the bits I needed to fit a UPS
Adrian Kingsley-Hughes/And I'm not going to be put off by the typo on the battery charger!
"Batter" charger
Adrian Kingsley-Hughes/The HAT connects to the Raspberry Pi using pogo pins that press onto the underside of the GPIO pins.
Pogo pins connect the HAT to the Raspberry Pi
Adrian Kingsley-Hughes/OK, here are the assembly instructions.
Big spacers go on the battery side, shorter ones on the side that will face the Raspberry Pi.
Four flat-headed screws attach the Raspberry Pi to the HAT.
Notice how the pogo pins fit against the underside of the GPIO pins. The advantage? Not only is no soldering required, but you can still use the GPIO pins on the top of the Pi.
It's a lot easier to tighten the screws if you have a magnetized screwdriver. I used a magnetizer/demagnetizer to make my screwdriver tip magnetic.
Making my screwdriver bit magnetic makes fitting the screws a lot easier!
Adrian Kingsley-Hughes/Tighten the screws holding the HAT down a little bit at a time, don't just crank down on one screw then go to another because that will misalign the pogo pins.
When done, check the alignment of the pogo pins against the GPIO pins.
Make sure to get the polarity right.
I used the domed screws to hold the cover in place. This prevents metal bits from falling into the battery compartment and possibly shorting things out.
All that's left to do is connect the power to charge the batteries, and flip the power switch to turn on the Raspberry Pi. (Remember to fit a microSD card containing an operating system... I forgot!)
OK, while a HAT is the most convenient and reliable way to set up a UPS for a Raspberry Pi, there is another option: use a power bank.
You can use the power bank to power the Raspberry Pi, and connect the power bank to a charger to keep it topped up.
Also: These are my 3 must-have Raspberry Pi accessories
Unfortunately, you can't use just any power bank. The power bank has to support a feature called pass-through charging. This is the feature that allows the power bank to be simultaneously charged while charging a device.
Not all power banks support this, but power banks fromZendure , Goal Zero , Omni , and Renology support this feature, and offer much greater backup capacity than two 18650 rechargeable batteries can provide.
Also: The 5 best portable power banks: Keep your devices juiced on the go
Another alternative is to use a power station, from makers such asJackery orBluetti . All power stations I've tested support pass-through charging.
 Tags chauds:
Notre processus
Maison & bureau
Tags chauds:
Notre processus
Maison & bureau
Inscrivez-vous par courriel maintenant pour le Stock de Promotion hebdomadaire
100% free, Unsubscribe any time!
Add 1: Room 605 6/F FA YUEN Commercial Building, 75-77 FA YUEN Street, Mongkok KL, HongKong Add 2: Room 405, Building E, MeiDu Building, Gong Shu District, Hangzhou City, Zhejiang Province, China
Whatsapp/Tel: +8618057156223 Tél. : + 33 (0) 3 88 88 20: 0086 571 86729517 Tel à HK: 00852 66181601
Courriel:: [email protected]
 English
 Pусский
 Français
 Español
 Português