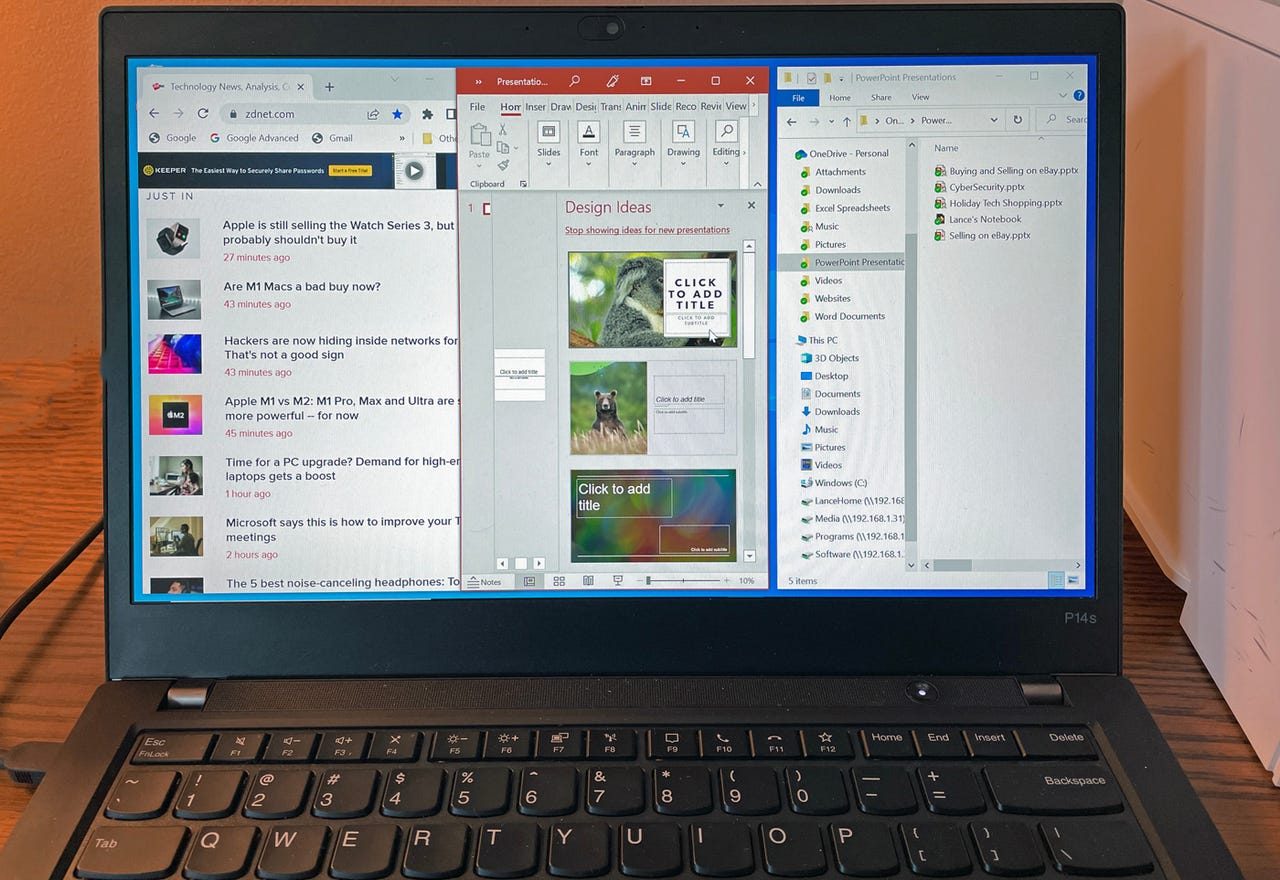


FancyZones in use on my laptop.
Lance WhitneyAs I work with different apps in Windows, I often need to open and view several windows at the same time. The problem is that positioning and arranging multiple windows to appear on the screen together can be challenging. You may want to position a certain number of windows in a certain layout, but Windows itself won't let you easily do that, not even with the built-in Snap feature. One utility I've found handy for this purpose is FancyZones, one of many tools that come with Microsoft's free PowerToys.
Designed for Windows 10 and 11, FancyZones lets you apply and create layouts with a set arrangement of rows, columns, or overlapping windows. You can trigger a predefined layout and then precisely move each window into a specific zone, so all the windows coexist peacefully.
FancyZones lets you define the number of zones for each layout along with the padding and spacing so you can fully control how and where they appear on the screen. You can also create your own customized layouts. FancyZones works the same in Windows 10 and 11. Here's how.
Figure 1
In the Editor section, click the entry forActivation Shortcutif you wish to define a different shortcut to trigger the tool; otherwise, leave this as is. The next entry forLaunch editor on the displaydetermines where the layout editor appears when you launch it. Click its dropdown box if you wish to change the location (Figure 2).
Figure 2
Figure 3
2. Reduce the size of the layout editor and then click each of the templates. Each template you select is displayed behind the layout editor, so you get a visual sense of how and where your open windows would appear. Notice that most of the layouts position each zone next to each other horizontally or vertically. The exception is the Focus layout, which applies overlapping windows (Figure 4).
Figure 4
Figure 5
You can manually reposition a specific window by dragging and dropping it by the title bar. But if you want to snap a window into a specific zone, remember to hold down the Shift key and then drag it to the right spot. Naturally, you can also minimize, maximize, or resize any window in a zone.
Also: How to snap your windows on MacOS and Windows
You can tweak the different default layouts.
Figure 6
Figure 7
5. The next screen is where you define the format of the new layout. By default, the layout starts with three columns.
6. As you move your mouse along the layout, notice the horizontal blue bar that appears. If you click on the spot where that bar is positioned, you'll split the current zone into two separate zones. Hold down the Shift key, and the bar shifts from horizontal to vertical (Figure 8).
Figure 8
7. If you wish to remove a zone, essentially merging it with a zone next to it, hold down your mouse button and select the two zones you wish to merge. After the two zones are highlighted in blue, click theMerge zonesbutton (Figure 9).
Figure 9
8. Next, drag and drop the border between any two zones to resize them.
9. When done, clickSave & apply (Figure 10).
Figure 10
Beyond editing and creating templates, you can adjust certain settings for FancyZones.
Return to the FancyZones screen in the PowerToys Settings window. Different sections organize the settings.
The section for Zones determines whether zones are activated when you hold the Shift key while dragging them and how the zones work across multiple monitors. The section for Windows controls how windows look and behave when you're using FancyZones. The section for Layouts allows you to use layout-specific shortcuts in the editor.
Finally, the section for Excluded apps lets you add any apps that you don't wish to include in FancyZones (Figure 11).
Figure 11
 Tags chauds:
Vie professionnelle
productivité